Taddah!!!

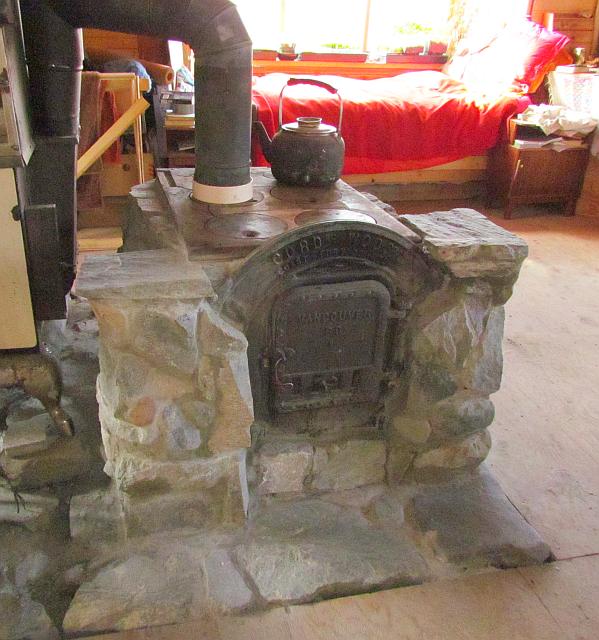
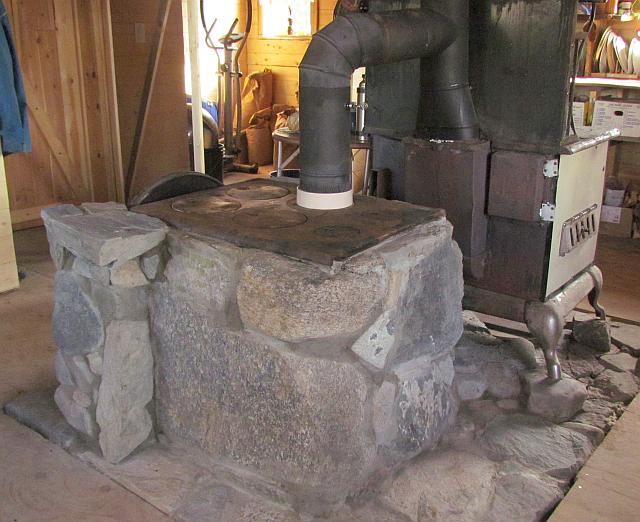
 I wasn’t sure how to fit the chimney. There wasn’t room behind the cookstove to insert the chimney into the wall. So I figured I could run it directly through one of the lids on the cookstove top.
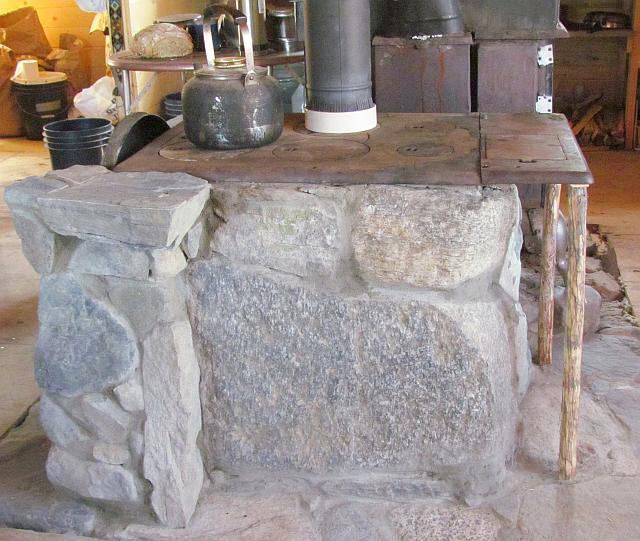
The original cookstove top had an extension that was designed to fit over a water reservoir. It will be useful as a warm shelf to rise bread or for similar purposes.
 I got the idea of building a stone oven from a friend who incorporated a Tulikivi soapstone stove into the house he built. He installed it himself and got a special deal on it – it cost him only $11,000.
Our stove was made mostly with found materials. The door and top were from different stoves but were free. The chimneys pieces I already had – and they didn’t even need cutting! The sand and rocks were collected locally. The only cost was a little over a bag of cement – about $25 – and about 100 hours labour!
I let the stove I built in the mountains set for two weeks before I lit a fire. Soon water was boiling out of the cement! So I will not be putting a fire into this one for a while. Soon I will have to go to Nuk Tessli for the summer (I am waiting for the ice to go out – like everywhere else, it is very late this year) so I don’t suppose I will be able to try it out until the fall.

Wow, Chris – that’s a great job. I’m sure it will birth many beautiful loaves of bread! As always, love your pictures.
Looks a great stove, thanks for the photos, enjoy your summer at Nuk Tessli ….
What a great stove!
That looks solid! Thanks for sharing pictures and description. Now I can give it try myself.
well done, it looks great!!!!
Wow, it’s a beauty!
I have really enjoyed the ‘Building a stone oven’ posts – and pictures.
I hope you have a good summer in the mountains.
Best regards from the 60th parallel north in Sweden.
Ben
A terrific story of how to build a stone oven, well illustrated. Maybe it will inspire others to do the same! (And I was glad to see our old stove top put to such good use.)
We enjoy your blog, so full of interesting stories and pictures.